June 24th was the 79th anniversary of the wedding, in East Boston, of my maternal grandparents, Leonardo Antonino Maggio (“Tony”) & Grazia Siracusa (“Grace”) — he from Salemi (province of Tràpani), she from Mineo (province of Catania).
In honor of this special date, I created this little collection of authentic recipes of our grandmothers.
I'm not sure that Italians fully understand the full significance that our Italian grandmothers had for us Italian-Americans. These grandmothers disclosed to us another world, the completely different world on the other side of the Atlantic. These grandmothers were a constant inspiration, reminding us that there was other beauty beyond the mundane things that we saw around us over here, every day.
MENU OF THE DAY
Appetizer
FRITTELLE DI NONNA LUCIA
recipe from Siracusa
by Veronica, “Dolci Armonie”
(http://dolciarmonie.blogspot.com)
First Course
TIELLA DI PATATE, COZZE, E RISO
recipe from Bari
by Fernanda, “Un soffio di polvere di cannella”
(http://unsoffiodipolveredicannella.wordpress.com)
Second Course
BRACIOLE DI MANZO
recipe of the “Monsù”
by Yours Truly
Dessert
BISCOTTI DELLA NONNA
recipe from the Campania region
by Laura, “Matematica e Cucina”
(http://matematicaecucina.blogspot.com)
* * *
FRITTELLE DI NONNA LUCIA
by Veronica
Today I suggest to you a recipe that I made yesterday and which is very
close to my heart, because it was passed down to me from my grandmother
Lucia, who now is no longer with us and with whom I was very close. I
still remember when she was staying at the summer home near the beach.
My parents were leaving for a week of vacation and Nonna had to watch
five unrestrained little girls, and she kept us in line! We dedicated
one evening, during that week without the parents, to making
"FRITTELLE." We didn't know which day of the week Nonna was chosing to
prepare them; it was always a surprise and every afternoon we would ask,
"Nonna, stasera le frittelle?" ("Nonna, tonight will we make the frittelle?), and she would response, "No, stasira no" ("No, tonight now). When after the third day we stopped asking, she came to us and said, "Tonight we will make the frittelle."
And how she enjoyed seeing our happy faces. Try them, delicious in
their simplicity, just like Nonna Lucia. Nonna, I miss your laughter.
Ingredients for c. 15 frittelle
For the dough:
500 g farina di grano tenero "00" (soft-grain flour — make sure it says "00" on the package)
500 g farina di grano duro (hard-grain flour)
1 cube fresh yeast*
½ tsp sugar
1 tsp salt
1 tsp extra-virgin olive oil
tepid water
For the filling:
500 g mozzarella
250 g prosciutto cotto (cooked ham)
10 olives
corn oil for frying
*=Translator's note: lievito di birra refers to active fresh yeast (a.k.a., compressed yeast, cake yeast, baker's compressed yeast, wet yeast). Despite the word birra, this does not refer to brewer's yeast, a nutritional product sold in pharmacies. — L.C.
Preparation
On a flat surface, make a well with the flour. In the center add the
crumbled yeast, sugar, salt, and olive oil. Mix the ingredients a little
bit; add tepid water a little bit at a time and knead until you have a
smooth, hard dough. Divide the dough into 15 little balls and place
them on a floured towel. arranged in a way that they don't touch each
other. Cover the balls well and let them rise for an hour. When they've
finished rising, roll them out on a floured cutting board. On each,
place pieces of ham and two slices of mozzarella, or mozzarella and 3
pitted olives, and cut in half. Fold up the dough and close the edges
as you would a calzone (see photo).
Fry the frittelle in corn oil for 3 or 4 minutes per side, until golden. Drain on paper towels, and eat them while they're hot.
***
A FAMILY RECIPE: LA “TIELLA” DI PATATE, COZZE, E RISO
by Fernanda
There are recipes capable of reawakening memories of your childhood,
just as the soft madeleines aroused Marcel Proust's youthful memories in
his great novel, À la recherche du temps perdu.
Today a plunge into the past, when on Sunday mornings I lingered,
enchanted, in front of the kitchen counter to observe the skill and
meticulous precision with which Nonna Maria prepared the ingredients and
then assembled the “tiella” of potatoes, mussels, and rice.
And if now I can say that I succeeded in learning how to make this
wonderful dish of the Barese tradition, it was precisely those mornings
spent with my grandmother cutting potatoes, arranging the mussels one
next to another, and distributing the grains of rice in the enormous
aluminum oven pan.
Every family has its own recipe, and even within the same family there
are slight variations, particularly in regard to the zucchini slices
(Nonna put them on the top layer, while one of my aunts put them on the
bottom layer, and another aunt put them on top of the rice; other family
members omit them altogether) or the cooking liquid (simple water, or
the water from the mussels, carefully filtered).
The recipe is calculated for industrial quantities; keep in mind that we
never eat it with fewer than 5 or 6 people, and when there's a little
left over, we eat it either at
cena or at the next day's
pranzo (which
everyone says is even more delicious, because the flavors have extra
time to blend).
It's a rather elaborate dish to prepare, but the secret is to prepare
all the ingredients in advance (all the cutting and cleaning). Then to
assemble everything takes only a few minutes.
Ingredients for a 13" oven pan
2.5 lb yellow potatoes
3.33 lb [1.5 kg] mussels
1 lb rice, parboiled
3 medium zucchini
10 or 11 oz. canned tomatoes (the flesh only, not the liquid), chopped fine
Freshly grated cheese
Extra-virgin olive oil
1 large onion, cut into small slivers
Salt
Fresh parsley, chopped
Breadcrumbs
Preparation
Clean the shells of the mussels with a little brush, eliminate the
beard, and with an appropriate small knife remove the top shells. Save
the liquid in a bowl, because it will be used later.
Peel the potatoes, and slice them about 1/8" thick. Keep them in a bowl, covered with cold water.
Peel and dice the onion.
Slice the zucchini into thin disks.
Pour the rice into a bowl and cover with cold water.
Now let's begin to assemble everything.
On the bottom of the pan, add some of the salt, oil, parsley, onions, tomatoes, and grated cheese.
Arrange half of the potato slices, one next to another. (Don't put them
on top of each other, or else they won't cook uniformly.)
For the second layer, add the mussels [the bottom shells still intact], arranged neatly one next to another.
Strain the now-softened rice and distribute it uniformly. On top of
that, add more salt, oil, parsley, onion, tomato, and grated cheese.
Add another layer of potatoes. Top with more salt, oil, parsley, onion, tomato, and grated cheese.
Then add a layer of zucchini disks, arranged one next to another.
In a bowl, prepare the cooking liquid. You can either use ½ litre
water alone, or you can use the mussel water (filtered through a sieve
lined with 2-3 layers of cotton gauze to remove all residues) plus
enough water to reach ½ litre. Add some salt to this liquid; stir
until the salt is dissolved. The amount of liquid is approximate; if you need more,
there is always time to prepare some more salted water.
Cover the pan and put it on the gas until boiling. This step serve to
accelerate the cooking time somewhat. I do it for 15 minutes, carefully
turning the pan on the flame so as to distribute the heat uniformly.
In the meantime, heat the oven to 400° and prepare a mixture of bread crumbs and grated cheese.
Take the pan away from the heat, take off the cover, distribute a
sprinkling of the bread crumb and cheese mixture, and complete by
drizzling oil on top.
When the oven is hot, put in the pan on a medium-low rack for about 20
minutes. (The times are always approximate and depend on the quality of the
rice and of the potatoes. Add more cooking time if necessary.)
Once cooked, take the pan out of the oven, let it rest for at least 10 minutes, and serve.
***
BRACIOLE DI MANZO
by Leonardo Ciampa
On Sundays, my grandmother made a big tomato sauce, a.k.a.
sugo. And in every sugo she put meatballs, a rack of pork ribs, and a big hunk of sirloin. Sometimes she also put sausages.
The Christmas sugo and the Easter sugo followed the same recipe as every Sunday, with only one difference: the addition of the
braciole.
I couldn't understand why so many recipes for
Neapolitan braciole were almost identical to that of my
Sicilian grandmother. I did a little research. I discovered that the invention of braciole is attributed to the Cavalier Signor Ippolito Cavalcanti, Duca di Buonvicino. The Duke was the author of a very important cookbook,
Cucina Teorico-Pratica. And the moment that I saw the year of the book's publication — 1837 — I immediately understood. It falls neatly within the years of the Kingdom of the Two Sicilies (1816-1861), when southern Italy was under Bourbon, therefore French, rule.
That very era spawned the cuisine of the
monsù. The word “monsù” (also written “monzù”) is a corruption of
monsieur. It refers to the chefs of this era, like the good Duke, who were influenced by French cuisine. And many recipes of the monsù were very similar in the Kingdom of the Naples and the Kingdom of Sicily. (A very good example is the
sartù di riso, a type of timballo only with rice instead of pasta.)
Who knew that this recipe by my humble grandparents was such a noble dish!
My grandmother was a creature of habit. She rarely experimented or improvised in the kitchen; she repeated the same recipes and procedures every year. Braciole were no exception. She always used thin steaks from the top round. (Even though they're thin, you still have to beat them with a meat pounder and wax paper.)
 |
| The steaks, before pounding. |
My grandmother's fillings were always the same:
- slices of prosciutto or ham
- slices of salame or soppressata
- slices of mild provolone
- fresh parsley
- freshly grated pecorino (My grandmother never used parmigiano. Parmesan was not part of the cuisine of the Southern Italian farmers of the olden days.)
- hard-boiled eggs
- raisins (Certain recipes say to soak them in water first.)
- pine nuts (I prefer pistachios, which are less expensive, more delicious, and more Sicilian! Even though ours are from California, they are excellent. You could halve them if you want; all you need is 6 or 12 of them.)
- some homemade breadcrumbs (not shown)*
 one oil-cured black olive (In my grandmother's fridge, she always had a jar of these wrinkly olives. She would put one of them in certain dishes, e.g., her pizza (Sicilian-style, with a thick crust), or her "spinach pizza" which was actually a calzone of spinach, ground beef, and a few cold cuts for flavor. I would say to experiment with other olives; either kalamata or the big green Sicilian olives would be perfect. But I say this hesistantly, for these oil-cured olives were for my grandmother something of a trademark.)
* = Addendum (September 2016): Last month I was going through a file of old, yellowed recipes. I found a slip of paper on which I'd taken down my grandmother's recipe for braciole. I had no recollection that she and I ever discussed it. True to form, there was more detail about how to fasten the braciole than there was about how to cook them! (She was a seamstress!) Fortunately, in this blog post (which I wrote from memory), I remembered everything, except for one single ingredient: she added a little bit of breadcrumbs. Certainly a Sicilian touch. However, if you add them, be sure to dampen them a little with oil, milk, or water.
Here I will confess that sometimes I found my grandmother's braciole a little dry. I saw a recipe that suggests to spread a little lard or olive oil on the meat. I got the idea to make a paste. I often have homemade lard in my fridge, but today I didn't. And in the garden I didn't have much parsley, but I had a good amount of thyme. Thyme being a wonderful complement to beef, I chose that. Therefore, in the food processor I put olive oil, thyme, pecorino, black pepper, and I added a garlic clove. A paste like this does wonders in many types of roulades.
However, here I made a little mistake. I decided to add also the pistachios to the food processor. The paste was fantastic and very interesting. But at the end, when I ate the finished braciole, I couldn't sink my teeth into the pistachios, which make an important contrast to the sweet raisins.
So, how do we bind the braciole? In my memory, my grandmother used only steel pins. However, my mother says that before, my grandmother used to use kitchen string. I don't know why she changed methods.
The next step is to brown the braciole. In her biggest frying pan, my grandmother put olive oil, sliced onion, salt, and pepper. (You wouldn't put garlic if there is already some in the braciole.) In this pan, she browned, in turn, not only the braciole, but all the meats that were going into the sugo. The big hunk of sirloin ... the rack of pork ribs ... the sausages if she was using them (but sometimes she put them raw into the sugo) .... and the famous meatballs ...
Now, how do we deglaze this pan, which now contains all the flavors of Heaven?
My grandmother never put either wine or broth in her sugo. To deglaze this pan, she put one 6-oz. can of tomato paste and two can's-full of water. This tasty sughetto ("little sauce") went into the big pot which already contained the rest of the sugo.

(A short digression on meatballs. To put garlic, or not to put garlic? If we put raw garlic, it's too strong. If we don't put any garlic, a little something is missing. What did my grandparents do? Many a time did I witness this procedure. They kept their slices of stale bread in the cold oven. After a couple of days they got very hard. My grandfather took a garlic clove in his fingers and physically scraped it into the hard bread. Then, he put this very fragrant bread into the hand-held grater
— the type that they use today for parmesan, except that in those days the graters were all steel. This is how they made homemade breadcrumbs that then went into the meatballs. Just imagine the aroma!)
In total, Grandma's sugo cooked for several hours. The already-browned meatballs went in only 30 minutes before the end. The other meats each had their own cooking time. The braciole she put in an hour before the end. (And by the way, she put in the basil only 5 minutes before the end!)
At this point, I must stray from Grandma's kitchen, for she never made braciole separate from the big sugo.
You will definitely have opportunity to make only the braciole, without a big sugo. In fact, the original, 19th-century braciole were like that, with their own sughetto.
After browning the braciole, deglaze the pan. I used just water. Red wine would be delicious, especially if you use Nero d'Avola or Lacryma Christi del Vesuvio. For goodness sake, please don't use Chianti or another wine that clashes with Southern Italian food. (Ironically, two wines of the extreme North concord beautifully with a red sauce: the bold Barbera and the docile Dolcetta d'Alba.)
If you don't use wine, you could use homemade beef or pork stock. But water works perfectly well. And the braciole already contain a complex array of flavors. Don't hesitate to use simple water, like I used.
Into the deglazed pan, put peeled tomatoes that you've already puréed in the blender. (Don't use canned tomato purée or tomato paste.) Add a little salt and pepper, but never add sugar to a sugo. Grandma used raisins and a piece of carrot. You would do well to add a third ingredient: a few sun-dried tomatoes. (I never saw them in my grandmother's kitchen, but she spoke nostalgically about sun-dried tomatoes, which figured prominently in her mother's cooking. It's not like they could afford much meat! That was one advantage of marrying my grandfather, a butcher!)
Cook the sughetto slowly for one hour. During the cooking, you can add a little water as necessary. But you never add wine or broth after the initial deglazing. You don't want to overwhelm the flavor of the tomatoes.
I never took the braciole out of the pan, even during the deglazing; I cooked them a half hour per side. If you want to cook them less, you can brown the braciole, take them out of the pan, deglaze the pan, cook the sughetto for 30 minutes, then put the braciole back into the pan and cook them 15 minutes per side. The total cooking time in still 60 minutes.
 |
| You can see that I was so anxious to cut one open that I didn't bother to cut the string off first! If you refrigerate the leftovers and gently reheat them the next day, they cut cleanly and beautifully. But why would you have leftovers? |
Like other recipes of the monsù (e.g., Agglassato), this sughetto makes for a phenomenal sauce to put on pasta. This way, you can make the first course and second course simultaneously. That's just what I did, choosing campanelle as the pasta. In my opinion, campanelle are the perfect pasta for this sughetto; I can't give you a logical reason why.
* * *
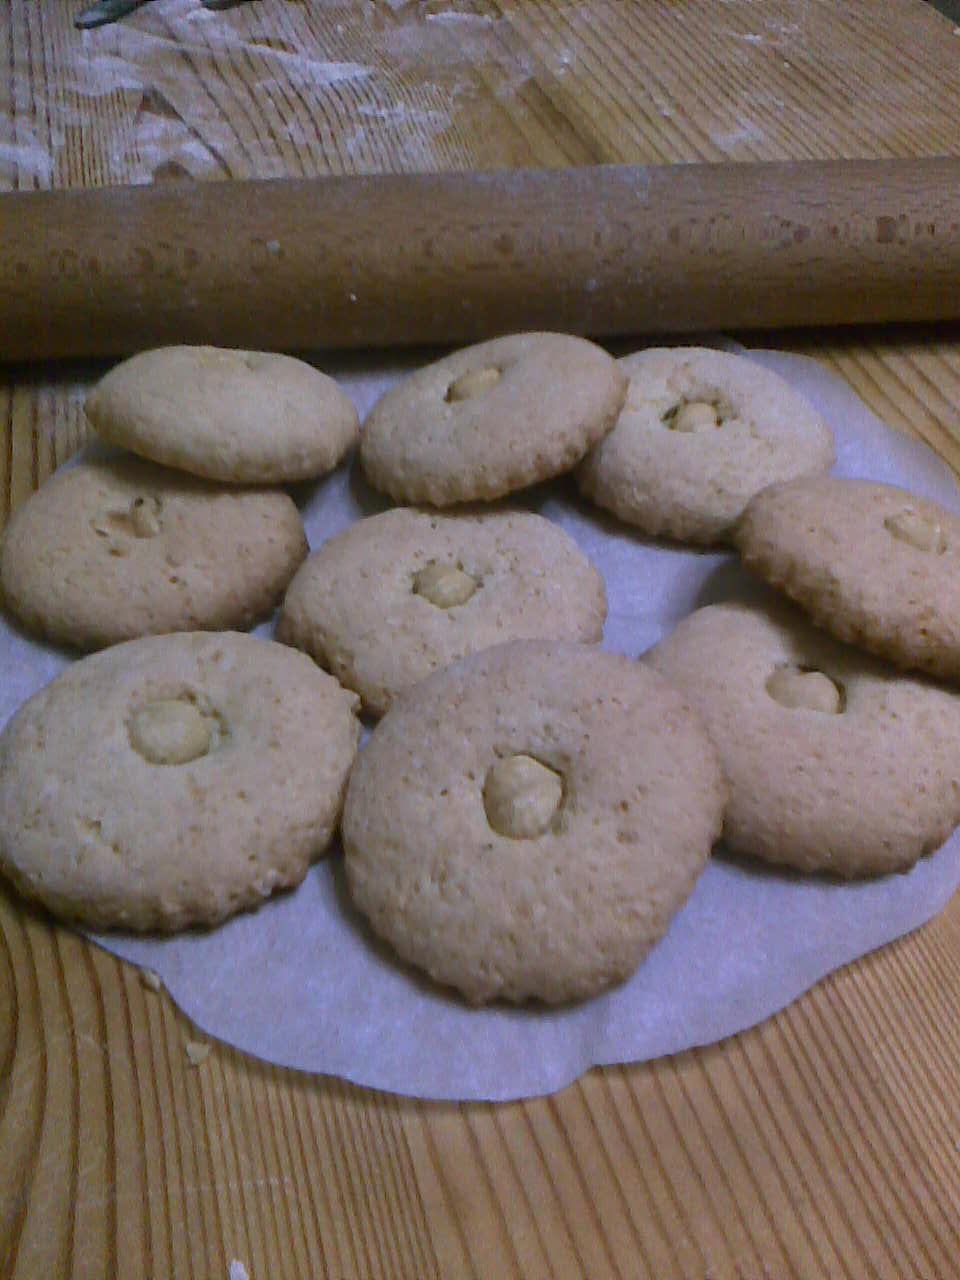
BISCOTTI DELLA NONNA
by Laura Tulimiero
Here is the recipe for some really good cookies. The flavor reminds me of the cookies that I ate as a child, in the small town in Avellino where I grew up, during the Easter season.
I was in the supermarket (in the baking goods aisle, where always go out of curiosity!!!), and I saw little bags of Bicarbonato di Ammoniaca [in English "baker's ammonia"], which according to the package was to be used as a leavening agent for making tea cookies.
[Translator's note: Unlike American baking soda, which is sodium bicarbonate, this is ammonium bicarbonate. The old-timers used baker's ammonia, which made cookies and crackers extra crispy. According to the King Arthur Flour website, "Baker’s ammonia (ammonium carbonate) is a classic leavener, called for
in your grandmother’s or great-grandmother's recipes. Use in
old-fashioned recipes calling for it (or for hartshorn)."]
On back of the package there was even a recipe to make old-fashioned cookies without shortening. I bought the package and tried the recipe.
Usually, for almost all cookies, I made the logs of dough, then slice them. This time, however, I rolled out the dough and cut out the cookies, which I garnished with a toasted hazelnut.
The flavor gets better after a day or two. Try and see if you can resist them that long!
Ingredients: for c. 25 cookies
250 g flour
2 large eggs
150 g sugar
¼ teaspoon
ammoniaca (baker's ammonia)
milk if necessary
25 toasted hazelnuts
Preparation
On a cutting board, knead all ingredients except the hazelnuts. Roll out the dough to the thickness of 4 or 5 millimeters (between 1/4 and 1/8 of an inch). Cut out the cookies with a cutter, and garnish each with a toasted hazelnut. Place the cookies on the baking sheet lined with parchment paper and bake at 350º for about 15 minutes.
Take out of the oven, let cool, and store in a cookie jar. They will still be tasty even after a week.
***
Heartfelt thanks to all the contributors. And, suffice it to say, Buon Appetito!